Nederlands
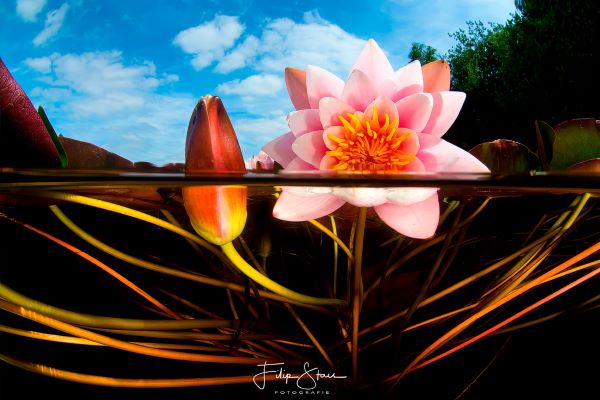
Split shots, also called half-in, half-out or over-under shots, are loved because they blend what's above and below water. Picture an island with palm trees and fish swimming beneath, or someone diving in. These shots make holiday scenes more exciting by showing two worlds at once.
Capturing stunning split shots involves careful attention to detail, especially when it comes to managing the water line. Here's a simpler breakdown to help you nail those underwater masterpieces:
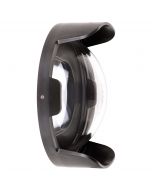
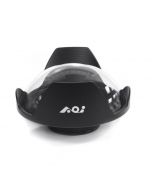
Start by selecting an 8" dome or even a larger dome for your camera housing. This larger dome size helps create a smoother transition at the waterline, giving you better image quality both above and below the surface. Combine it with a super wide-angle or fisheye lens capable of focusing closely, typically around 30 cm or closer. This setup ensures you capture the entire scene in stunning detail.
Ikelite underwater systems published a video with tips & trics for Split shots.
When shooting split shots, achieving the right camera settings is crucial for capturing both the underwater and above-water elements in your frame with clarity and balance. Here's a guide to help you set up your camera for successful split shots:
1. Aperture
Selecting the appropriate aperture setting is essential for controlling depth of field and ensuring sharp focus throughout your image. Generally, you'll want to use a narrower aperture (higher f-stop number) to maximize depth of field, especially if you're aiming to capture both near and distant subjects underwater. An aperture setting between f/8 and f/16 is often recommended for split shots, depending on the specific conditions and the level of sharpness you desire.
2. Shutter Speed
As mentioned earlier, choosing the right shutter speed is crucial for freezing motion and preventing blur in your split shots. A faster shutter speed is typically preferred to capture sharp details, especially if there's movement in the water or if you're shooting in less-than-ideal lighting conditions. Aim for a shutter speed of around 1/125 or faster, adjusting as needed based on the specific conditions and creative intent.
3. ISO
ISO sensitivity determines your camera's sensitivity to light, and the appropriate ISO setting will depend on the available light and desired image quality. Start with a low ISO setting (e.g., ISO 100 or 200) to minimize noise and maintain optimal image quality, especially if you're shooting in well-lit conditions. However, in low-light situations, you may need to increase the ISO to achieve proper exposure while balancing noise levels.
4. Focus
Achieving sharp focus is crucial for capturing detailed and crisp images in both the underwater and above-water portions of your split shot. Use manual focus or autofocus with a focus point selected near the middle of the frame to ensure that both areas are adequately focused. If your camera supports it, consider using back-button focus to separate focusing from shutter release, allowing you more control over focus adjustments.
5. White Balance
Set the white balance according to the prevailing light conditions to ensure accurate color reproduction in your images. If shooting in RAW format, you can adjust white balance during post-processing, but it's still beneficial to set it as accurately as possible in-camera.
6. File Format
Shooting in RAW format provides greater flexibility during post-processing, allowing you to make more extensive adjustments to exposure, white balance, and other parameters without compromising image quality. However, if RAW files are not an option, select the highest-quality JPEG setting available on your camera.
Experiment!
By carefully adjusting these camera settings and experimenting with different combinations, you'll be better equipped to capture stunning split shots that showcase the beauty of both underwater and above-water worlds.
While strobes aren't essential for split shots, they can be invaluable for balancing light between the surface and underwater portions of your image. Position them strategically to minimize glare and create a more evenly lit scene.
Why you do not want to use wide angle wet lens for split shots!
While wet lenses are commonly used in underwater photography to enhance magnification and widen the field of view, they're not typically ideal for split shots. Split shots require capturing both above and below the waterline in a single frame, which introduces challenges that wet lenses may not address effectively.
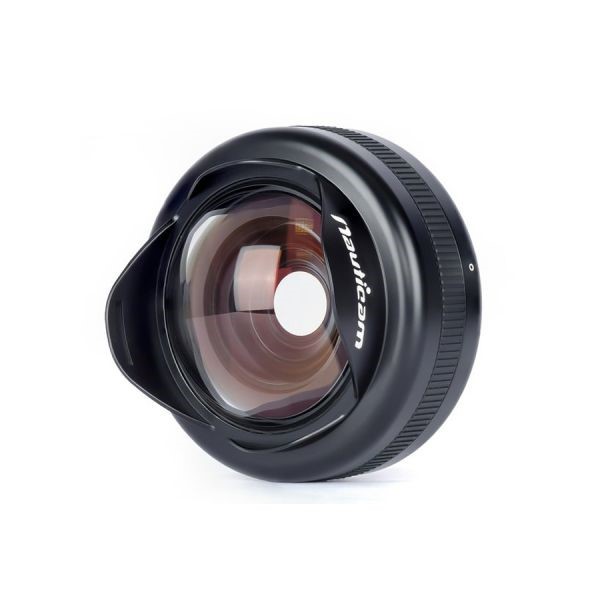
One of the main issues with using wet lenses for split shots is the difference in optical properties between air and water. Wet lenses are designed to function optimally underwater, where they compensate for the refractive index difference between water and the camera's housing. When part of the lens is submerged and the other part is above water, this difference in refractive index can lead to distortion, blurriness, or uneven focus in the resulting image.
Additionally, wet lenses may not provide the necessary coverage to capture both above and below the waterline in a single frame. Split shots often require a wide field of view to encompass the entire scene, and wet lenses may not offer the desired angle of coverage or may introduce vignetting, where the corners of the image appear darker.
Overall, while wet lenses are fantastic accessories for underwater photography, they may not be the best choice for split shots due to the unique optical challenges presented by capturing both air and water in the same frame. Instead, photographers typically opt for a combination of a large dome port and a wide-angle or fisheye lens to achieve the best results for split shots.
By following these tips and techniques, you'll be well-equipped to capture breathtaking split shots that showcase the beauty of both worlds above and below the waterline. Happy shooting!
Special thanks to our colleague Filip Staes for his stunning half-half shots!
![Nauticam 8.5 inch acrylic dome port [18802]](https://www.uwcamerastore.com/media/catalog/product/cache/a1e8b3e99aca28c73ff021371a2f00f4/1/8/18802-1.jpg)